Categories make accounting easy
Most companies using OneUp synchronize with their bank to retrieve their bank transactions. For many companies, over half of those bank entries are for expenses. Fortunately, thanks to our 90% automation rate, you are free from handling accounting for most of your transactions. But when a new kind of transaction comes up, you must decide how to account for that, by working directly with the Chart of Accounts.
We wanted to address that issue with the new Categories feature. Now Instead of working directly with Accounting’s chart of accounts, we have built in over 100 useful categories to assist you in entering your expenses and getting ready for tax time.
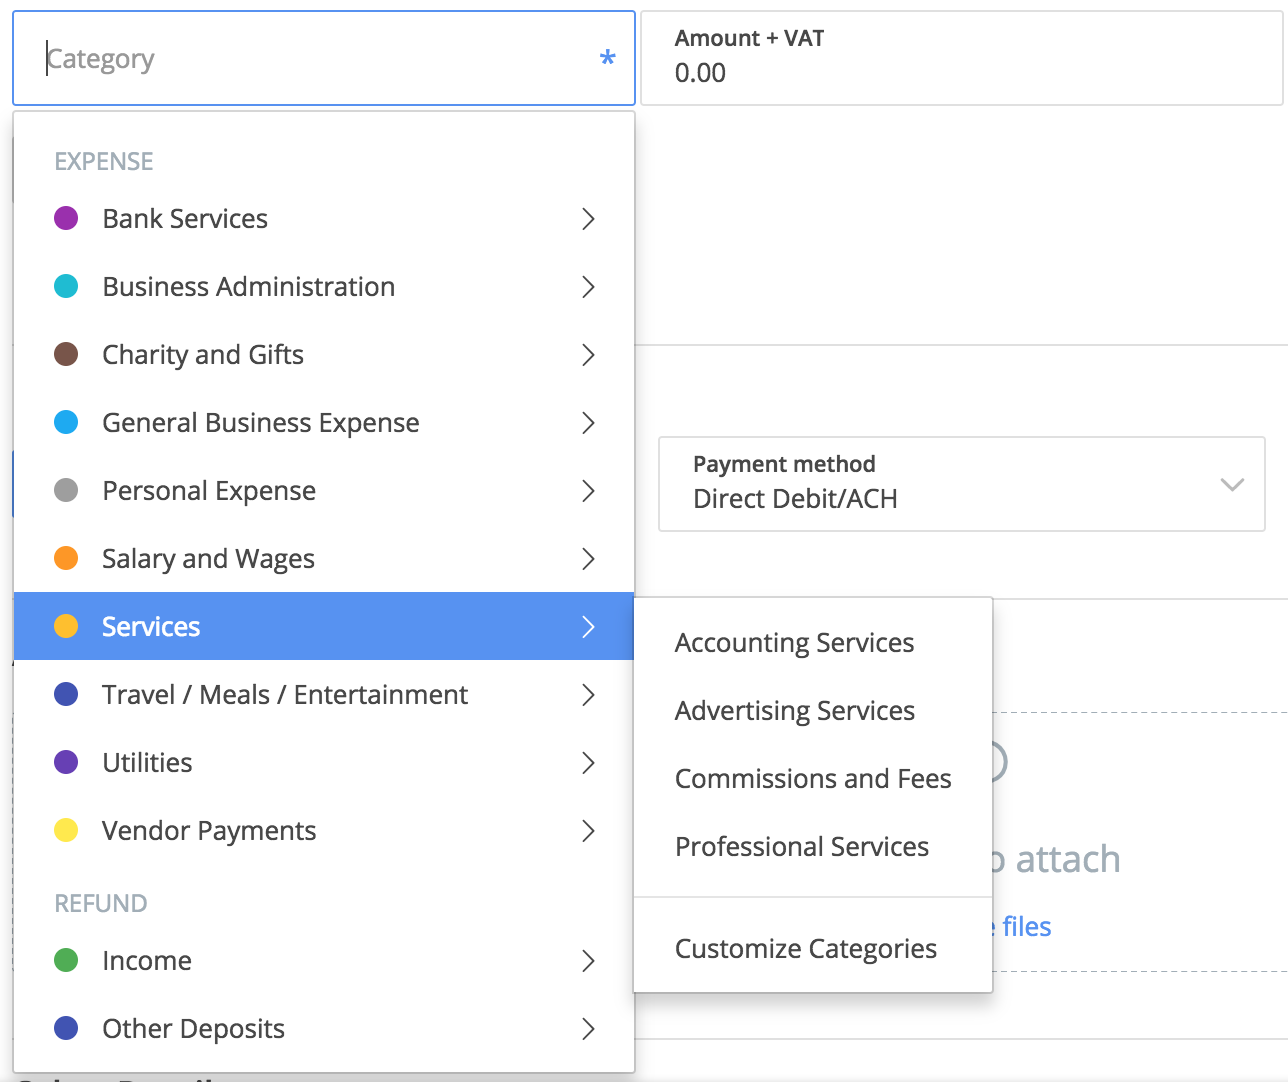
The Categories selector in Expense
What if the built-in categories are not enough? You can create custom categories and account for them any way you like! Have a lot of categories to add? You can even upload a list of categories from your prior solution and OneUp will add them to your account. More info about this is below.
CPA Mode for more advanced functionality
Everything you see above is the default “easy mode” of Expenses and Receipts which will work great for most people using OneUp. But certain people like accountants, CPAs and bookkeepers may still want to get their hands dirty and work more closely with the underlying accounting while working with expenses and receipts.
To handle this, we also include a CPA mode setting that adds some additional functionality, like:
- Always see the account number (from Chart of Accounts) associated to Categories
- See account numbers instead of category names on the list of expenses and receipts.
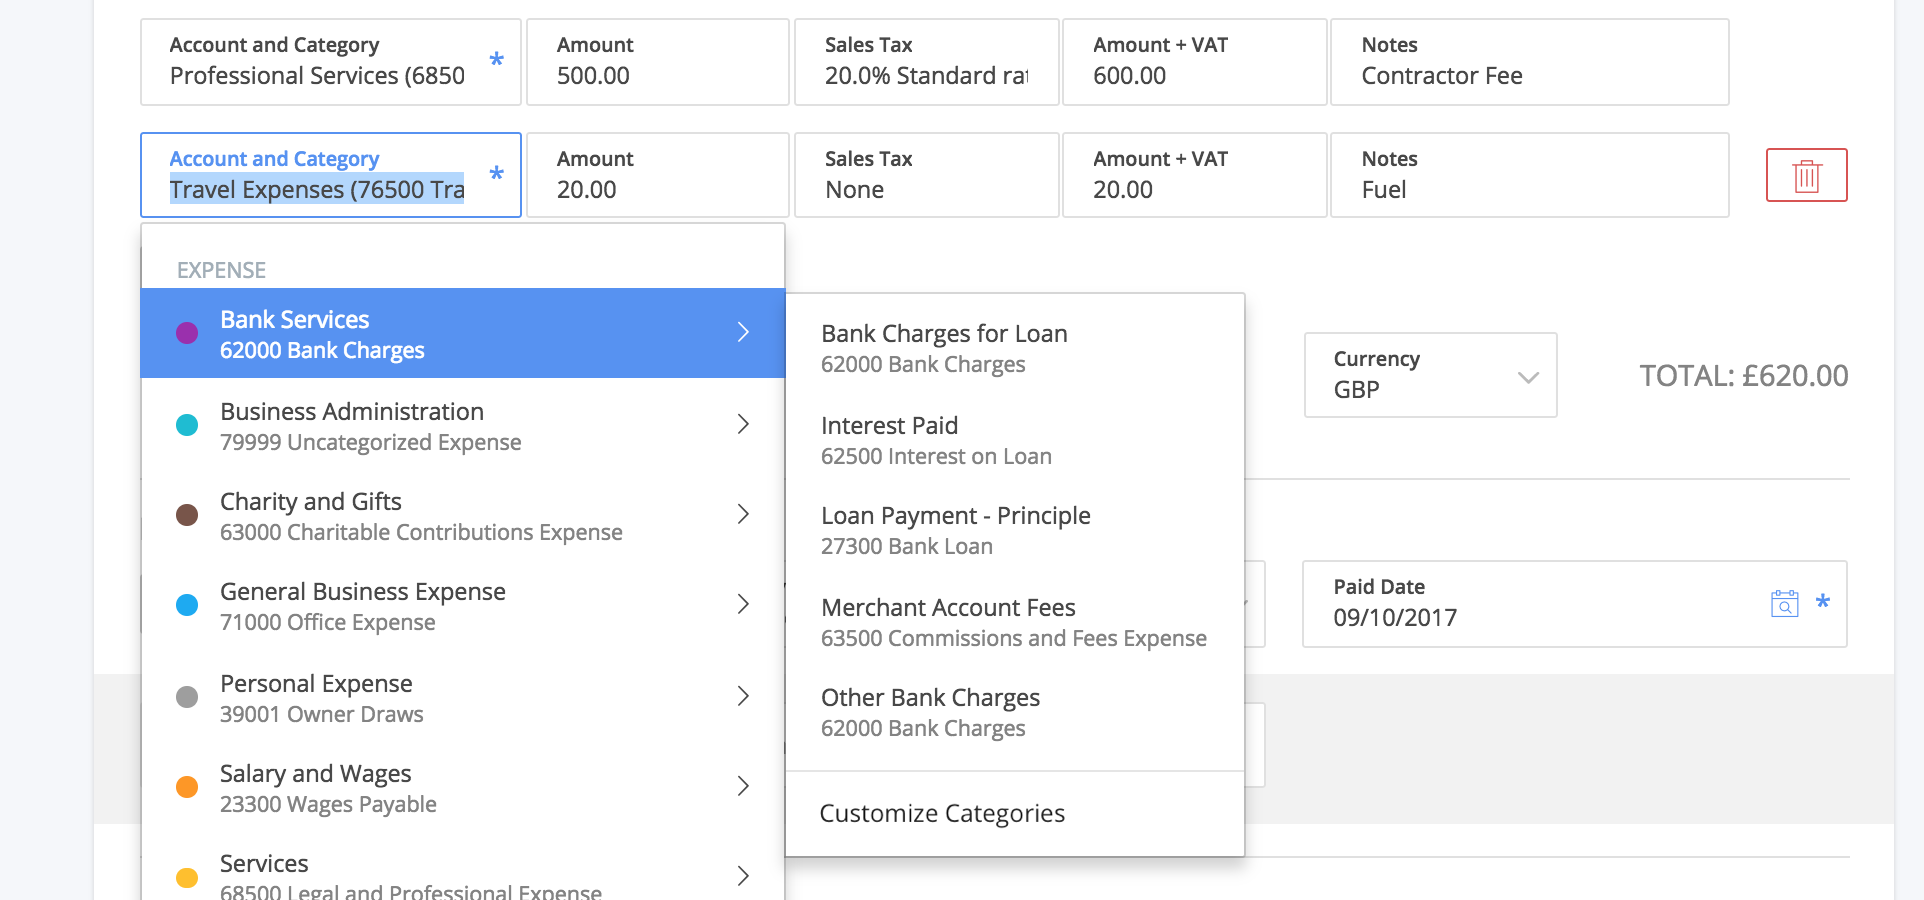
You can work with account numbers directly with “CPA Mode” enabled
With CPA mode enabled, you can also create new categories on the fly by entering directly the account from Chart of Accounts instead of category names on the expense and receipt lines.

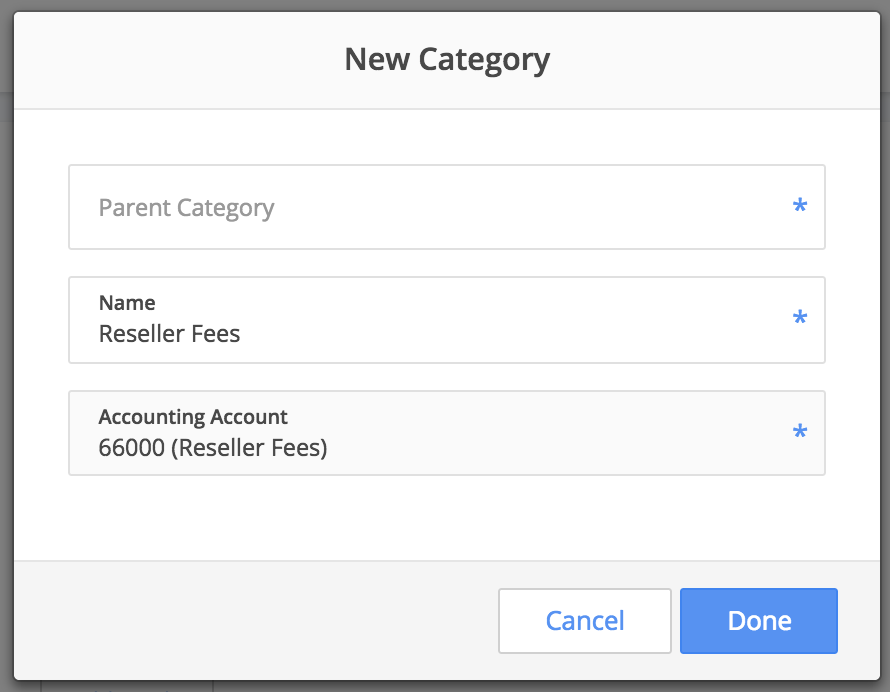
Image: on-the-fly category creation in CPA Mode
If your “User Role” was “Accountant” we have turned CPA mode on by default for you. If you need to turn it on even though your user role is not “Accountant”, you can do so in your User Settings Panel, under User Interface.
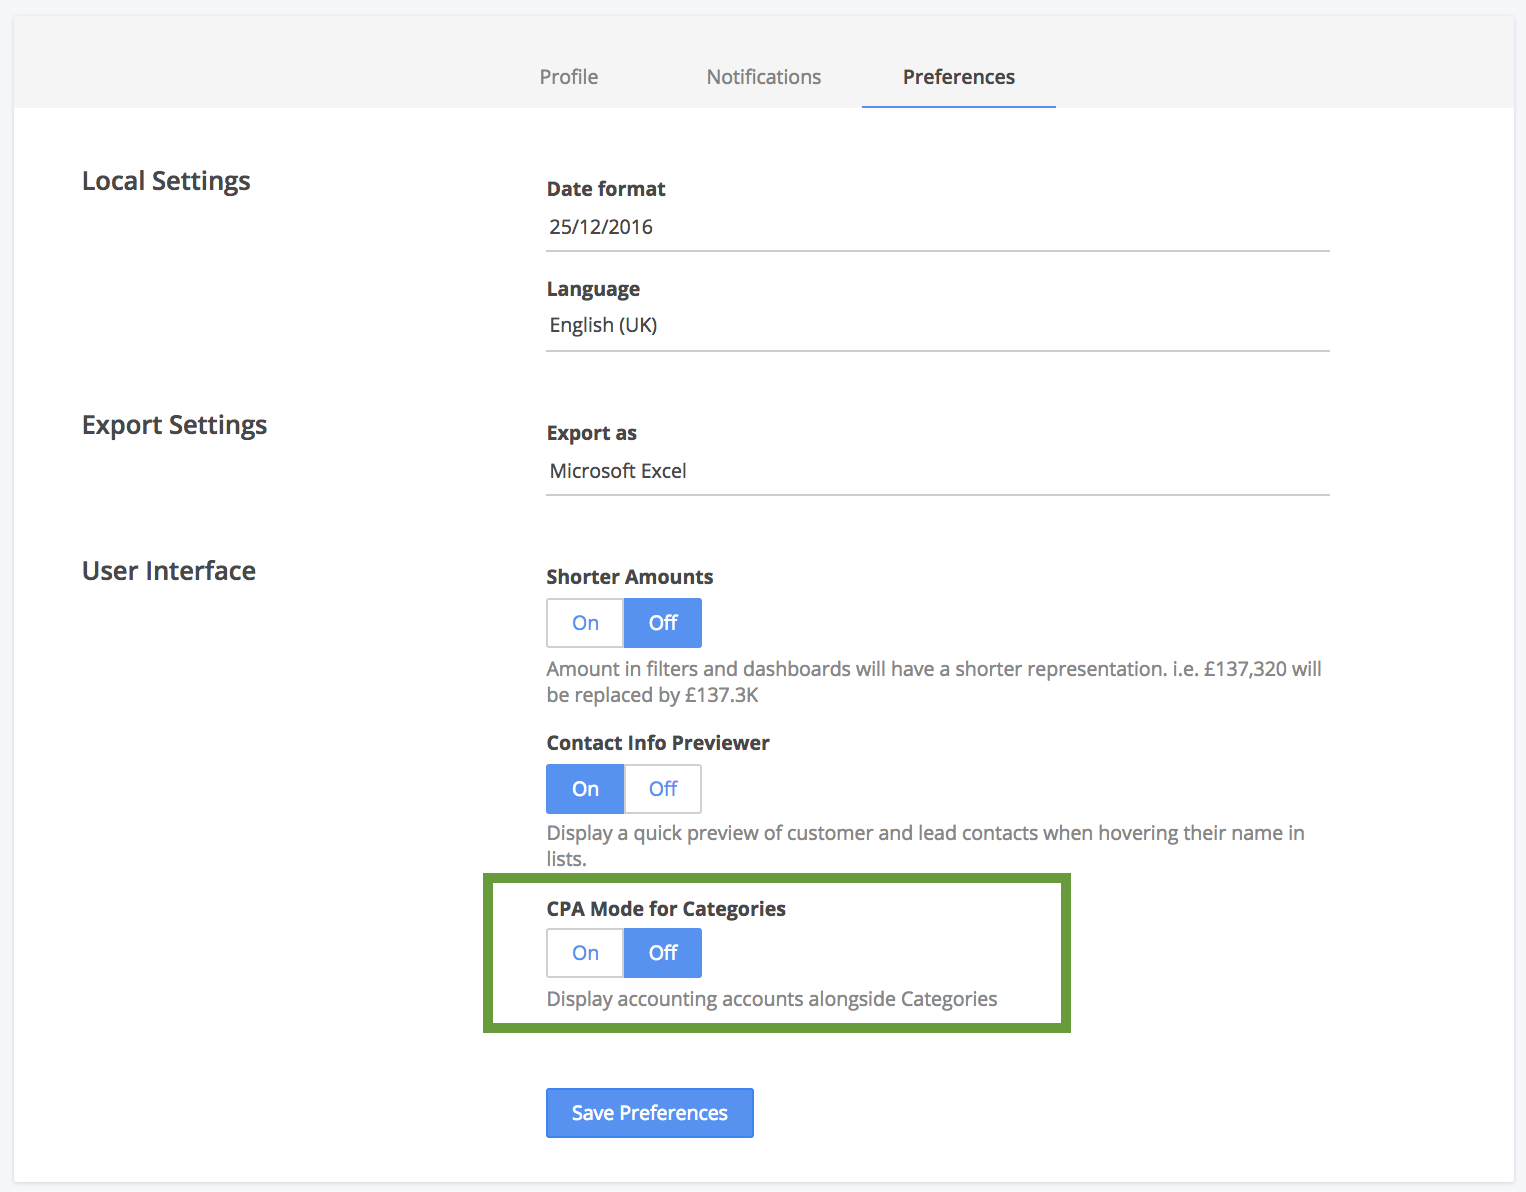
Turning on CPA Mode in User Settings.
Customize Categories
Like we said above, OneUp comes with over 100 of the subcategories needed for most businesses. But if that’s not enough for you, you can edit the categories.
There are two places you can do this, from the Expense form, and from the Accounting menu.
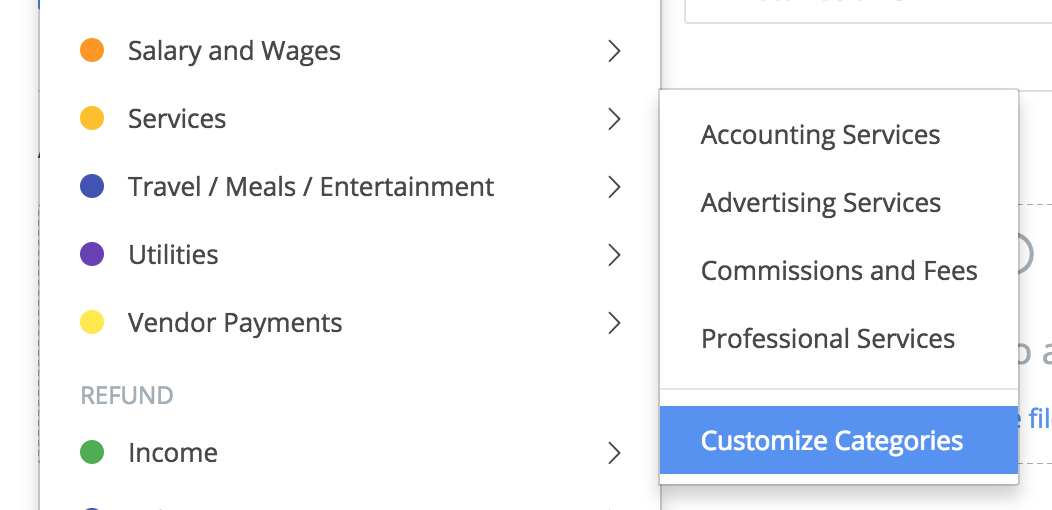
Accessing Customize Categories from within the Expense
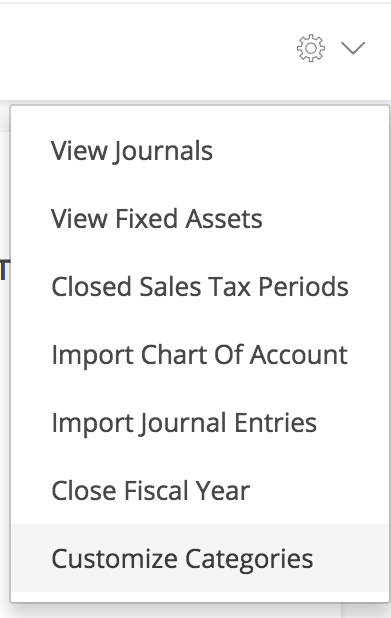
Accessing Customize Categories from within the Accounting ⚙ menu
Here’s a look at the Categories editor.
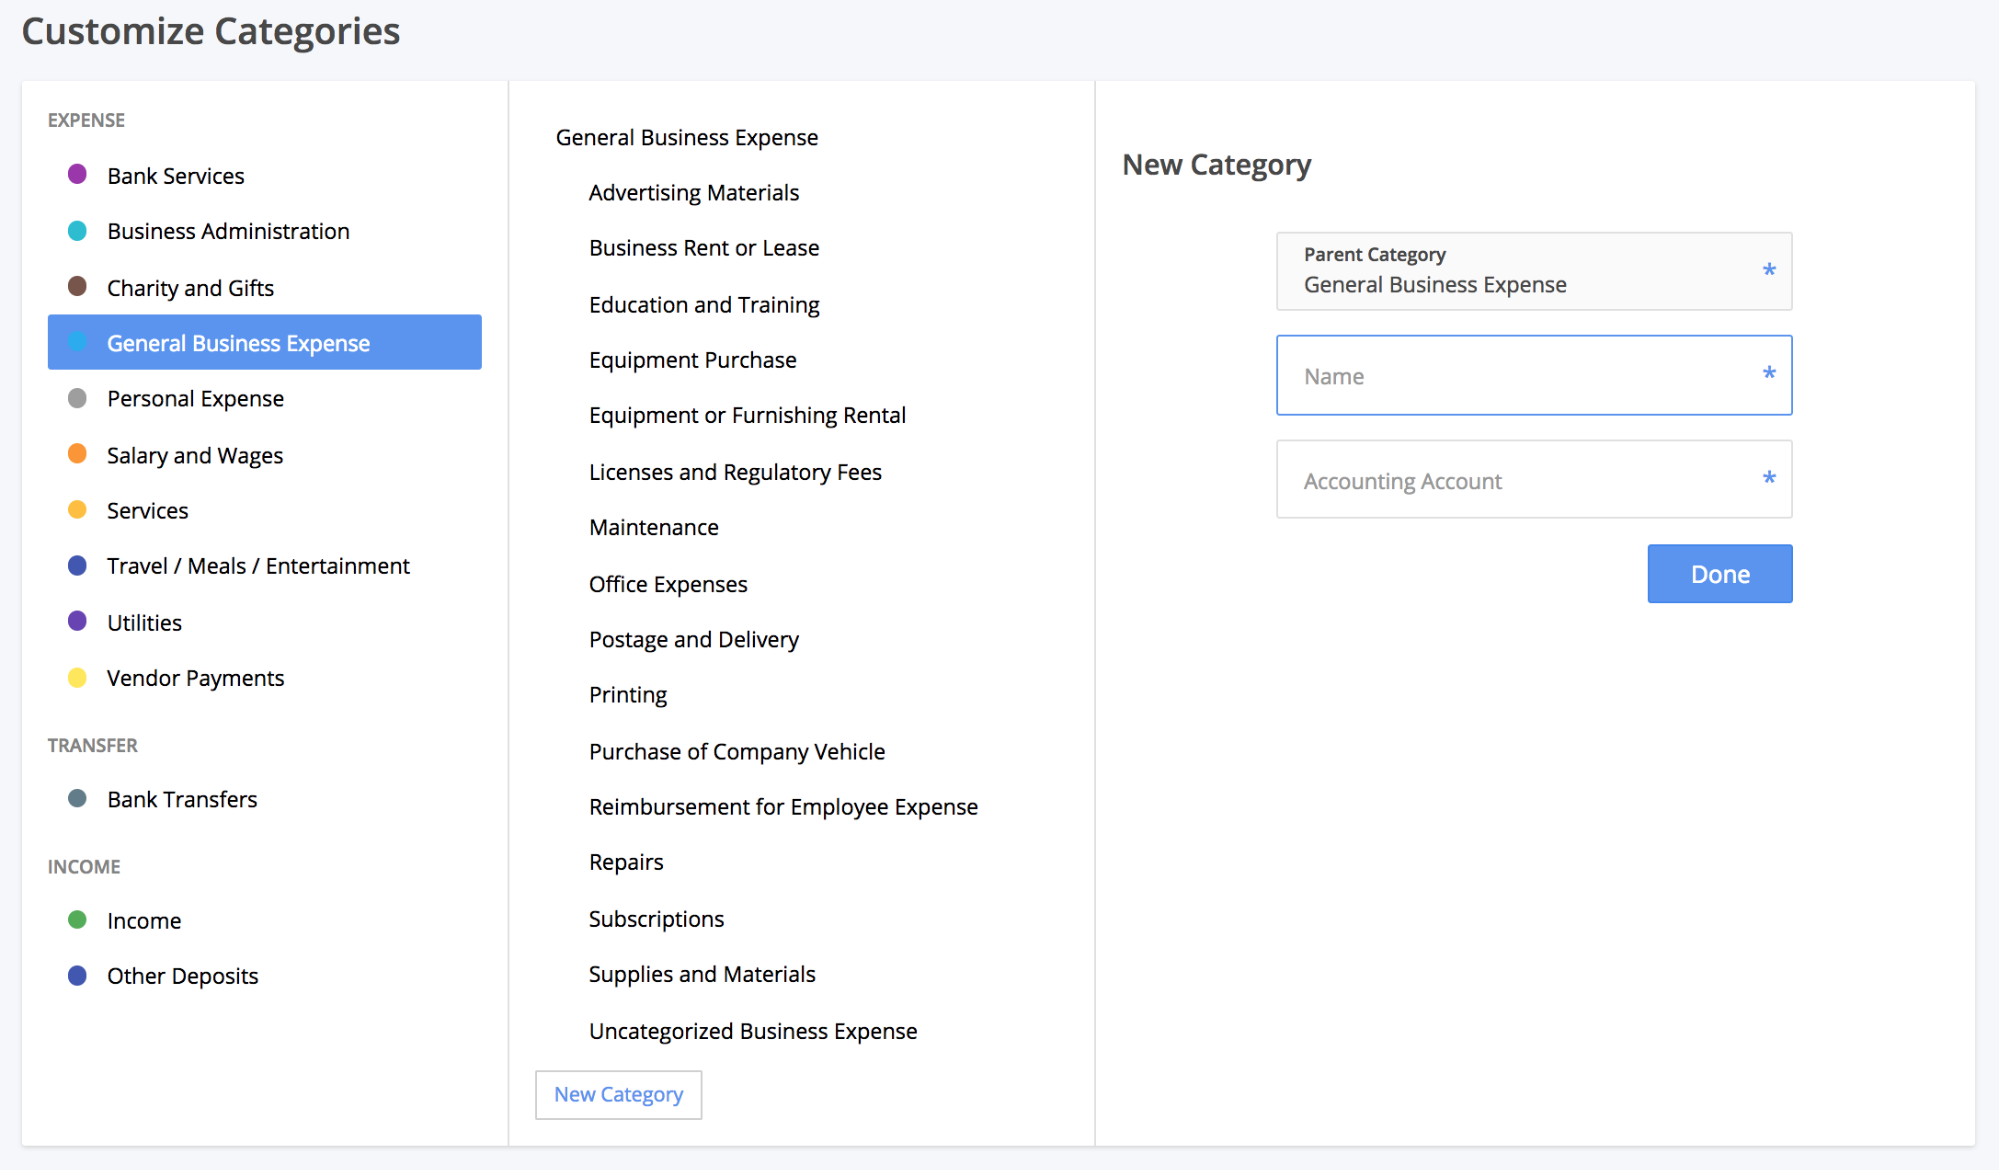
Adding a custom sub-category to the “General Business Expense” category.
From here, you can:
- Rename existing categories and sub-categories
- Change the accounting account associated with existing categories or sub-categories
- Add new custom sub-categories under any of the categories
Some things you cannot do:
- Delete existing categories or sub-categories
- Create new main categories
Upload custom Categories
Do you have a lot of changes to make to the Categories? If so, you can download a template of the existing Categories as a spreadsheet, and edit as required.
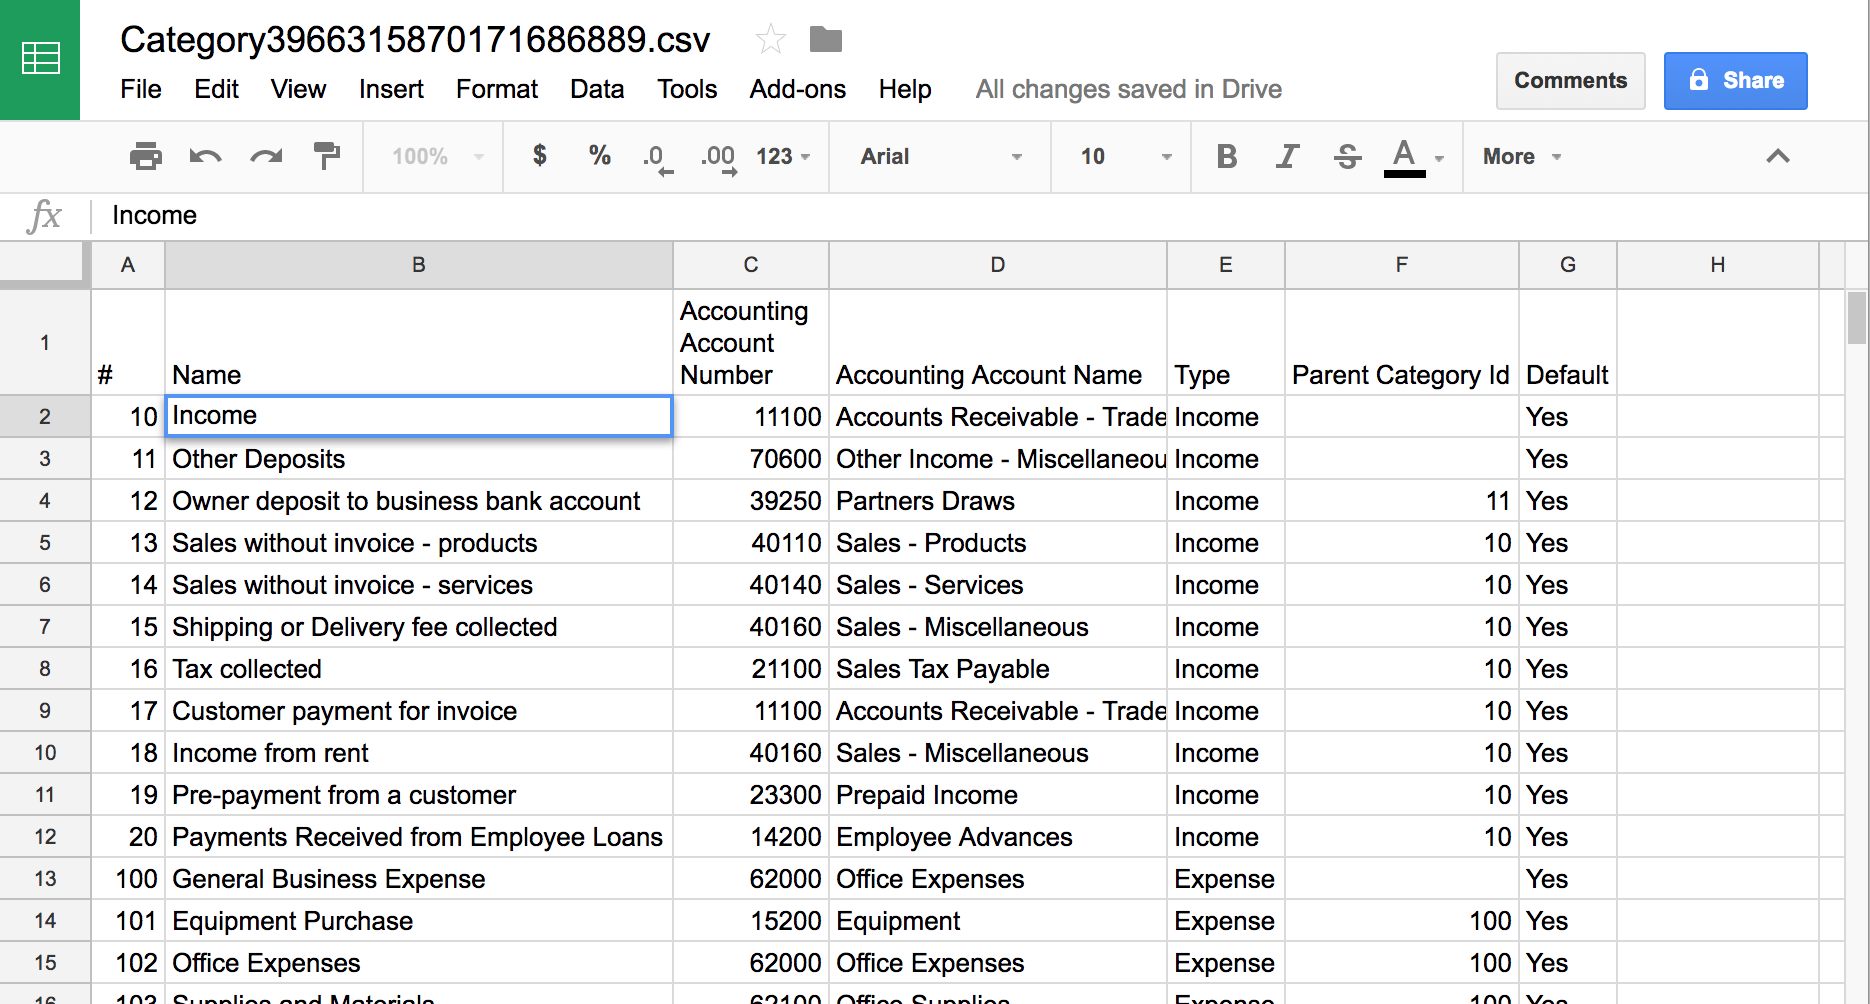
Editing the default template in a spreadsheet software
When you re-upload the file, your changes will be applied going forward. We do not go back and alter the accounting for already-made expenses or receipts if you remap a category to a new account.
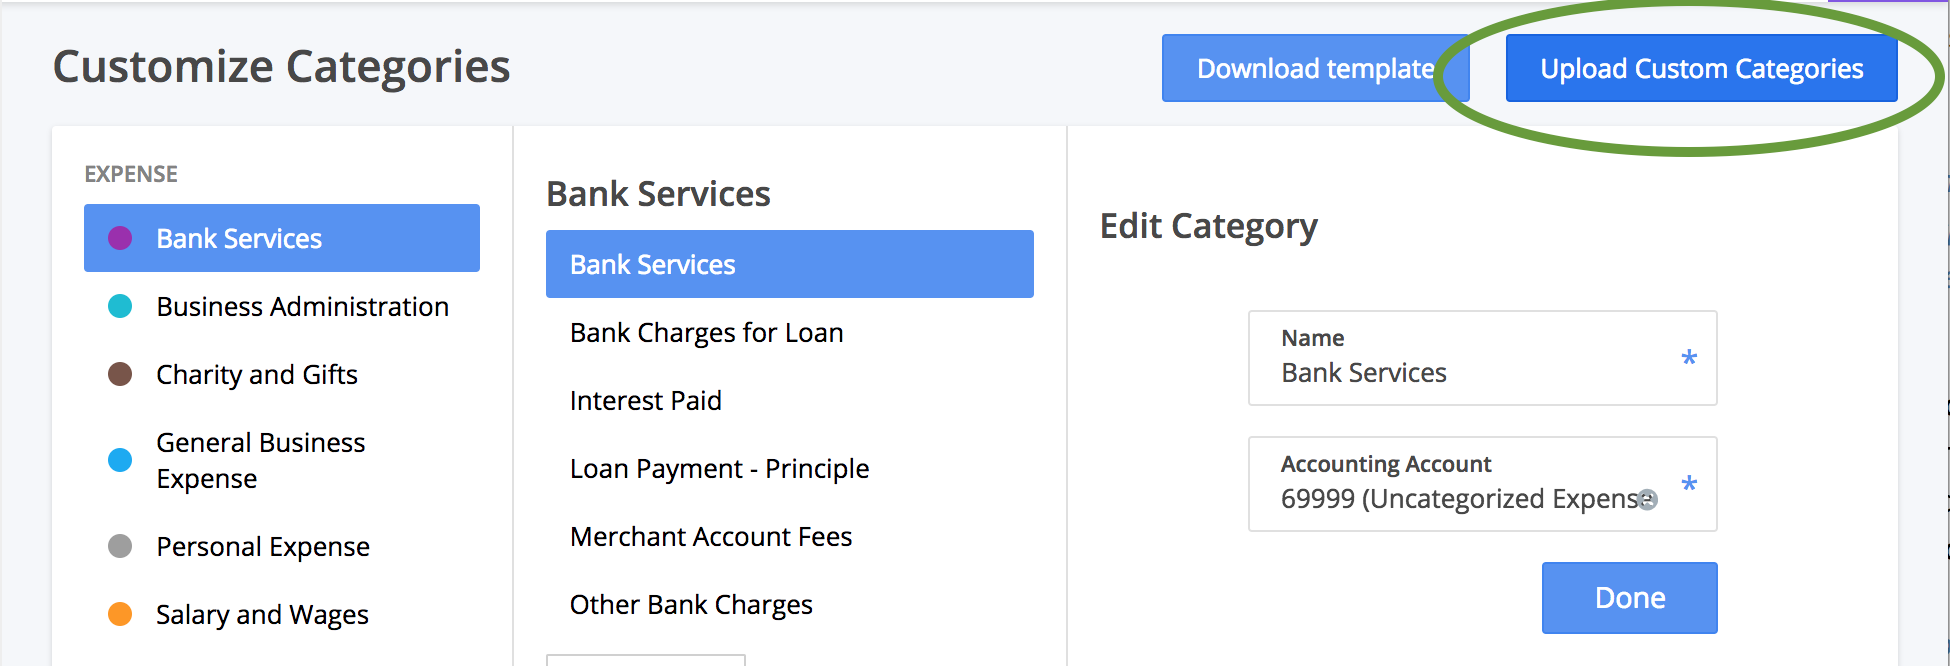
Upload the file from “Customize Categories” (accessible in Accounting > ⚙ )